How To Replace Your Bathroom Vanity
Are you wondering how to replace your bathroom vanity in Sydney? Follow this informative guide to learn how to replace your bathroom vanity yourself.
Read Full StoryDo you want your deck to be an evening retreat where you can enjoy your tea surrounded by plants on a deck surrounded by plants and beautiful furniture? You can undertake a DIY deck construction as long as you have the correct building materials for your home improvement projects. Now, you can finally make it happen!
A raised or semi-raised deck can change the garden’s ambience and provide a perfect resting place. It can keep plants and deck chairs with tables in the centre. You can also design one in Mediterranean style by adding ferns and bamboo furniture.

It’s different from composite decking. Composite Decking is a greener alternative to treated pine and is constructed from a blend of wood fibres and recycled plastic or fibre cement.
Being more environmentally friendly than timber, it provides a good alternative. It also requires almost no upkeep as it does not fall victim to the same environmental damage that timber does, depending on the size of the timber.
It may be tricky, but you build your own deck, utilising your knowledge to build a deck. And you do not have to look any further, as we have written about the entire process here.
To begin with, you will have to make the subframe before colouring it, and we will tell you about all the parts needed. You will also need to decide on your decking material choices. So, without further ado, let’s get going!
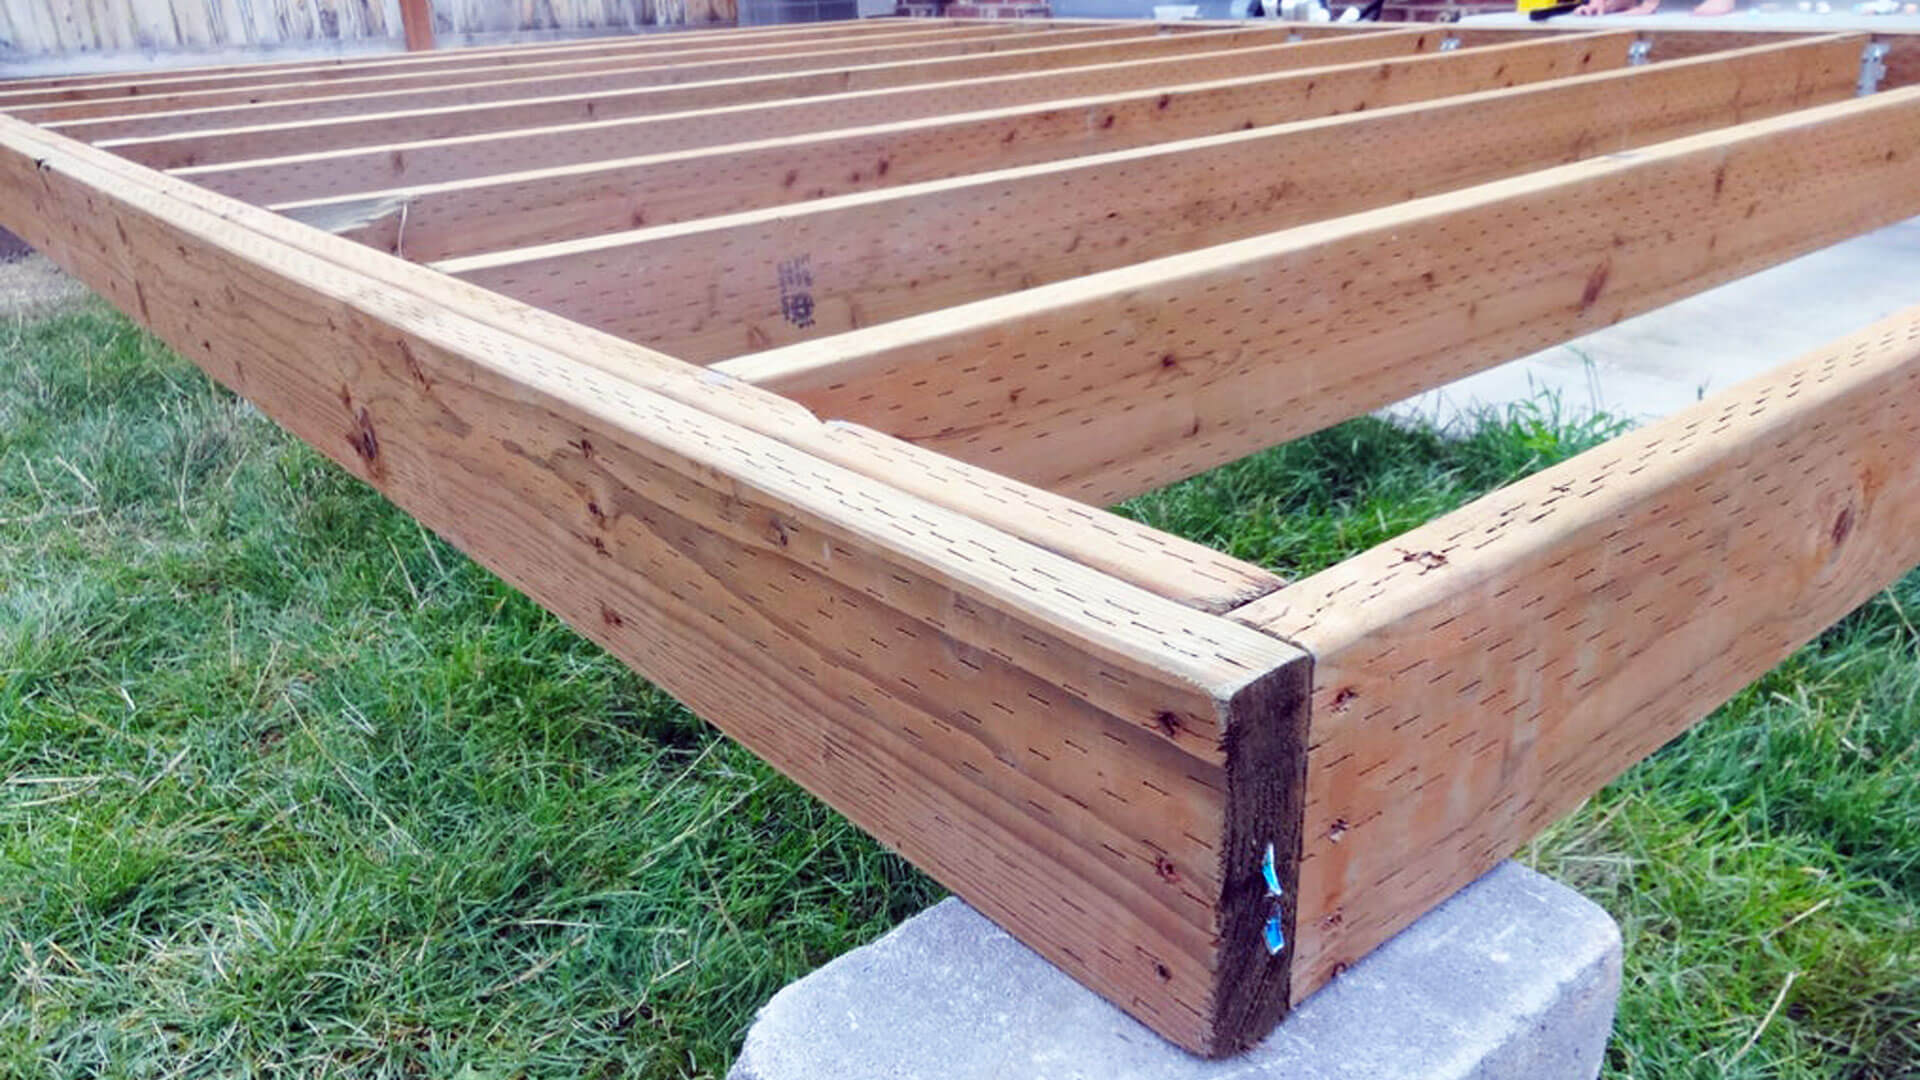
While making your subframe, you will need to pay attention to 3 things: decking posts, joints, and bearers. They will have to be connected well, and the size has to be correct so that the deck can hold much weight. Read on to know all about this process.

Before making the deck, you need to measure the area with tape. You may need someone to hold it from the other side.
Also, decide on the specific deck design beforehand, as you may want a square or a rectangular deck design. Some people also choose a half-circle method, which is usually challenging to make if it is your first time.
So, it is best to stick with a rectangular or square deck that you can measure easily. Plus, it can hold more things and be a more feasible option.
Once you have chalked out the area, you will need to remove anything present, including all kinds of vegetation, plants, flowers, grass, and other objects.
Also, if you have garden statues or fountains right outside, remove them to a safe spot until the deck building is complete. Ensure the entire area is free from obstruction before bringing out the wooden planks and posts.
After marking the area, you need to bury deck posts in the right places. Now, this will depend on how you want the deck to be placed.
If it is not attached to the house, you will require four posts; if it is connected, you will need only two. Before burying them, mark the ground so that the posts are at an equal distance.
What’s more, you will need to dig deep holes to keep the posts in place and lock them firmly. So, after you insert them, don’t forget to add post concrete, providing stability and stopping the posts from moving.
This is essential because you would not want water to collect on the deck that sits just above the existing concrete slab or ground level or insect damage when building a deck, as it may cause the wood to decay.
Water must slide down the surface, facilitating water runoff of your timber deck and flow away whenever it rains or cleans the deck.
Hence, ensure a slight and gradual slope before putting the joists and ledger in place.
Joists are wooden pieces placed horizontally on the entire surface, ensuring stability and efficiency. They form the main deck frame, and their size will be determined by the beams you have installed with joist hangers.
As a precaution, measuring one joist with the other is suggested, ensuring butt joins for added strength just to ensure that your measurements are right and apply joist tape for enhanced durability.
Now, these joists have to be placed at a specific distance from each other, meaning centre-to-centre measurement needs to be accurately recorded. Mostly, leaving a 500 or 600 mm space between is sufficient to ensure proper gapping.
The subsequent step in framing a deck involves attaching the beams, which look like ledger decking boards. However, they will not be attached to the house as they bear all the load and must be installed with appropriate footings.
The first board, often referred to as the ledger board, is one of the essential attachments, and it will connect the deck to your house. It is generally made with a single wooden piece and is very sturdy.
You must note that the wooden piece will hold lateral loads by withstanding gravity. Previously, decking was an easy job, and one did not have to consider many things before making it.
But today, there are several requirements for measuring, and it is best to get an engineer’s opinion. This is especially needed if you have no prior knowledge about the process and need extra help.
Even DIY enthusiasts can talk to an engineer who will help them plan the construction process, a vital part of building decks, following which they can do it themselves. Some also use prescriptive tables, which provide the correct dimensions to align the bolts and screws.
You can calculate the distances between fasteners and bolts by using this tool.
Here are some tips to keep in mind before beginning with the construction. This should help in proper planning while reducing the chances of going wrong.

The size of an available deck is not supposed to be more than 20% of the size of a house. So, calculate the footage of the house and then take your measurements.
Also, no part of a deck should be larger than the size of the rooms. Even if you plan to have a hot tub on the deck, its area needs to be smaller than the size of an adjoining room.
The deck placement should be such that it does not become too hot. There should be ample light, but it is best to build a shade, ensuring that the sunlight doesn’t hit the seating area directly.
We recommend chalking out the area and visiting it at different times during the day. This will help you find the shaded zones and the hotspots easily.
If trees are beside the deck, it would be best to check if they obstruct the view or provide partial shade. It will help determine how to position the furniture and the plants for maximum relaxation.
There are three popular styles to choose from: Colonial, traditional, and coastal. Traditional designs would go well with cottage-style houses; you can pair them with trimmed mouldings and decorative caps.
On the other hand, the colonial style includes symmetrical design and classical decor; it uses white to paint the post caps and railings. You can also have pergolas, benches, and a lot of planters around to enhance the look.
The coastal design will be attractive if your house is by the sea. You can use white and grey to paint the deck and railings or opt for glass guard rails that can lend the deck a refined look.
Irrespective of your choice, ensure the deck can withstand bad weather conditions and sudden storms close to the sea.
Depending on your area, the colours you use for a new deck must be water and weather-resistant. For instance, if a site receives heavy rainfall, the deck should handle it without rotting away.
By now, you must have realised that building the deck framing will not be easy and must adhere to many rules and regulations and meet the Australian standard. Also, depending on your society, you will have to get the permission of local authorities and meet building regulations before proceeding.
Talk to the authorities and local council and begin with the job. It is best to have someone helping you; you could consider hiring a couple of individuals offering competitive prices.
Working with a professional worker would help you complete the project, and you can also learn how to undertake similar tasks. If you are in Sydney, you can speak to our professional and reliable deck builders today.
Watch this space for more exciting and informative reads, and let us know about your experience in the comments section below. Take care, bye!
Are you wondering how to replace your bathroom vanity in Sydney? Follow this informative guide to learn how to replace your bathroom vanity yourself.
Read Full StoryWould you like to extend the life of your deck and prevent it from warping? In this guide, you will learn the different types of wood warping and how to avoid them.
Read Full StoryAre you planning to build a granny flat on your property? Check out our guide on the top six things you need to consider before you begin.
Read Full Story

